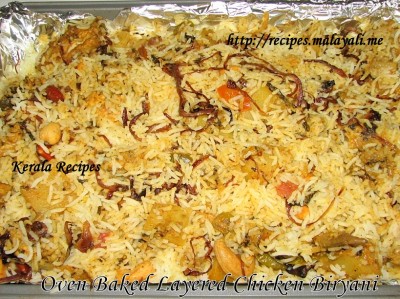
Biriyani or Biryani – the rich festive food made with rice, meat, vegetables, eggs, fish and spices, has become a common Indian household dish. With most of the ingredients available readily, making Biryani is no longer a difficult task. I remember my childhood days when Briyani was made by my mother only on very special occasions, probably twice or thrice in a year. We used to enjoy every bit of it and looked forward for the next special occasion. Now it is made almost every week or atleast once in a month by most of us. 🙂

Kerala Chicken Biriyani
The other day I was reading the difference between Biryani and Pulao. While Pulav is made by cooking all the ingredients together, rice is cooked separately and mixed with meat or vegetables for Biryani. Well that was a revelation. There are so many regional variations for Biryani. Some of the well known ones are Hyderabadi Biryani, Sindhi Biryani, Awadhi Biryani, Malabar or Kozhikode Biriyani and so on.
I usually make Kerala Style Chicken Biriyani but I never had the patience to post the recipe. After receiving several requests from my readers, well finally, here is my recipe for Chicken Biriyani. Kerala Style Biriyani is aromatic and flavorful. The addition of Fennel Seeds (Perum Jeerakam) and tomatoes make Kerala Style Biryani taste out of this world. Additionally, Coconut Milk is often used in South Indian Biriyani and the taste gets even better. One ingredient which is sometimes left out while making Kerala Biriyani is saffron.
This is the recipe for Layered Chicken Biryani which is baked in an oven. Though I have tried making one pot Biriyanis, it has never come out well.
Serves: 6
Ingredients
For the Rice
- Long grain Basmati rice – 2 cups
- Oil – 1 tsp
- Biriyani Masala Powder – 1/2 tsp
- Water – as required
- Salt – to taste
For Garnishing
- Thinly Sliced Red Onion – 1 big
- Cashew Halves – 1/4 cup
- Raisins – 1/4 cup
- Almonds – 1/4 cup (optional)
- Sugar – 1/2 tsp
- Salt – to taste
- Oil/Ghee – 1 to 2 tbsp
For the Biriyani Masala Gravy
- Thinly sliced Red Onions – 2 large
- Diced Tomatoes – 2 large
- Potato (peeled and diced) – 1 big (optional)
- Slit Green Chillies – 4 (Alter according to your spice tolerance)
- Cinnamon – 1″ piece
- Cloves – 4
- Fennel Seeds – 1/2 tsp
- Bay leaves – 2 to 4
- Chopped Cilantro (Malliyilla) – 1/2 cup
- Chopped Mint leaves (Pudhina) – 1/2 cup
- Dried Fenugreek Leaves (Methi/Uluva) – A few
- Fresh Ginger Garlic Paste – 2 tbsp
- Turmeric Powder – 1/4 tsp
- Kashmiri Chilly Powder – 2 tsp (Alter according to your spice tolerance)
- Chicken Masala Powder – 2 tbsp (Any brand, I used Eastern Chicken Masala Powder)
- Home Made Biriyani Masala Powder – 1 to 2 tsp
- Yogurt – 1/2 Cup
- Lemon Juice – 2 tbsp
- Salt- to taste
- Ghee/Cooking oil – 2 tbsp
For Marinating the Chicken
- Whole Chicken (medium sized pieces) – 1 lb
- Lemon Juice – 1 tbsp
- Turmeric Powder – 1/4 tsp
- Chicken Masala Powder – 1 tbsp
- Kashmiri Chilly Powder – 1 tsp (Alter according to your spice tolerance)
- Pepper Powder – 1/2 tsp
- Coriander Powder – 1 tbsp
- Fresh Ginger Garlic Paste – 1 tbsp
- Salt – to taste

Oven Baked Layered Chicken Biriyani
Preparation Method
- Soak Basmathi rice in water for around 20-30 minutes.
- Wash and clean the chicken pieces thoroughly and soak it in water along with 1 tbsp lemon juice for around 5 minutes. Drain and keep aside.
- Make a marinade using the above ingredients and rub it nicely on the chicken pieces. Keep it aside for atleast 30 minutes.
- Meanwhile, heat 1 tbsp oil/ghee in a nonstick pan and fry cashews, almonds and raisins until the cashews and almonds are lightly browned and the raisins become plump. Drain and keep aside.
- To the same pan, add 1 more tbsp of oil/ghee. Throw in the thinly sliced onions kept for garnishing and saute them on medium heat until they are fried and caramelized. This will take atleast 15-20 minutes. Keep on stirring occasionally so that the onions are not burnt. Add a pinch of salt and 1/2 tsp of sugar while frying the onions to enhance the taste.
- Fill a big 5 quart pan with 3/4th water and bring it to a rolling boil. Wash and drain the soaked Basmathi Rice and add it to the boiling water along little salt, 1/2 tsp biryani masala and 1 tsp oil. Cover and cook the Basmati rice for around 8-10 minutes till each grain is separate and 3/4 cooked but not fully cooked. Add more water if needed, so that the rice doesn’t stick together. Drain excess water and keep the rice aside. The cooking time varies with the rice used. So be very careful.
- Alternate Method for Cooking Rice – Heat 1 tbsp oil/ghee in a big pan. Add the drained Basmathi Rice and stir fry gently for 3-4 minutes. For 2 cups of rice, add 3 (4 minus 1) cups of water to the pan along with salt to taste. Bring everything to a rolling boil. Cover and cook on medium heat for 5 minutes. Continue cooking for another 5 minutes on low heat. Once, all water has been absorbed, open the pan and fluff the rice with a fork. Keep aside. This method seems to better for getting perfectly cooked rice.
- Heat a big non stick pan or wok and add 2 tablespoons of oil/ghee. You can use a combination of both oil and ghee for a rich flavor.
- Throw in fennel seeds, cinnamon, bay leaves and cloves. Saute for 2 minutes.
- Then add onions, slit green chillies, dried fenugreek leaves, chopped cilantro and mint leaves and saute till the onions begin to brown.
- Add the ginger garlic paste and fry for a minute or two.
- Throw in the chopped tomatoes and cook till the tomatoes are pulpy and mashed.
- Reduce heat and add 1-2 tsp of biriyani masala powder, 2 tbsp chicken masala powder, 2 tsp kashmiri chilly powder, 1/4 tsp turmeric and salt to taste. Saute the powders for a minute.
- Blend 1/2 cup of yogurt with 1/2 cup of water and add it to the pan along with salt and mix well. Allow it to simmer for a while.
- Add the marinated chicken and diced potatoes to the masala gravy and mix gently. Cover and cook on medium heat, stirring occasionally, for around 20 minutes till the chicken has been cooked thoroughly. Keep the masala gravy aside.
- Meanwhile preheat oven to 350 degree Fahrenheit (175 degree Celsius). Apply some ghee or oil on a baking pan/dish or line it with aluminum foil to prevent the Biryani from sticking onto the pan. Layer it with the semi cooked rice and the chicken pieces and masala gravy alternatively. Sprinkle lemon juice in between. Garnish with fried onions, cashews and raisins.
- Cover with an aluminuim foil or tight lid and bake for atleast 30 minutes. Allow it to cool thoroughly and then mix the biriyani gently with a fork. It’s best to keep the biriyani for a few hours before serving so that all flavors are absorbed.
- Serve the Chicken Biriyani with Raitha, Pickle and Pappad.
Note
- You can add coconut milk instead of yogurt for a better flavor.
- If you are in a hurry, you can use any good brand of Ready Made Biryani Masala powder (Eastern, Saras, Melam etc.) instead of Home Made Biriyani Masala Powder.
- It’s always better to use Whole Chicken while making Biriyani.
- If you do not have a Conventional Oven at home, then you can layer the Biryani and cook it on stove top. Take a heavy bottomed pan and grease it with ghee. Layer it with Rice, Chicken and Gravy as mentioned above. Cover the pan with a tight lid so that steam does not escape. If the lid isn’t tight, you can seal the lid with Chappathi dough. Cook the Biryani on very low heat for around 20 minutes.
- To prevent the Biryani from burning at the bottom layer, it is better to cook it over indirect heat. Immerse this heavy bottomed pan in a bigger pan filled with little water and cook it on low heat for 20-30 minutes approx. You can also place the heavy-bottomed pan over a Tava or Frying pan instead of keeping it directly on stove-top and then allow it to cook over indirect heat.


Hi friend,
I am not clear with the chicken briyani 15th step.. can u explain me.
Wow! No wonder your mother only made it twice a year! This is alot of hard work and effort. I tried your biriyani recipe tonight and was unsuccessful. This is my third attempt (and maybe final), as every time I make it, it is overcooked. I soaked rice for 40 minutes and cooked it for 10 minutes. I also substituted cocunut milk instead of yogurt. There was alot of masala and the biriyani was a bit spicy. Maybe you can post a chicken biriyani that is no bake like your egg biriyani. Will attempt to try again once I gain more confidence. Thanks again.
How many people does this recipe feed?
I tried this yesterday. I overcooked the rice a bit before draining it. But after baking it in the oven, it was tasty with all the masala and spices. Next time, I will be careful not to overcook the rice.
this recipe looks interesting. but i have a few doubts. can this method be used to make biryani over a gas stove too? what do u mean by ur “one pot biryanis” that have never come out well? thanks.
Hi Jisha,
I just wanted to thank you for having your website for kerala cooking recipes. I was always scared of cooking Indian food because I was not sure if I would do a good job. I tried several of your recipes in the chicken and meat section. I gained a lot of confidence after making meals the way you describe. I really look forward to cooking everyday because of your website.
Thanks for sharing this delicious recipe and I would like to inform you that I appreciate how you explained the step-by-step procedures clearly that makes it easy to follow, thats great. Were looking forward for more of yummy recipes from you. More power!. 🙂
I just thanked this site to give me a good briyani recipe .I maked this briyani at my home .my parents like this briyani and they congragulated me a lot